

Overview
Notch is a wearable motion capture (Mocap) system that uses up to 18 IMUs (inertial measurement units) to track the movement of various joints of an athlete and is able to provide visual feedback and data. Although this is already achievable using well established optical mocap systems (e.g. Vicon, Qualisys, Motion Analysis or OptiTrack), Notch aims to address three gaps in these systems:
Making Mocap more accessible
I. Cost – traditional optical mocap systems cost upwards of $10k; while a standard Notch Kit (with 6 IMUs) costs $379 (USD) and three Kits (with 18 IMUs) cost $1137 (USD).
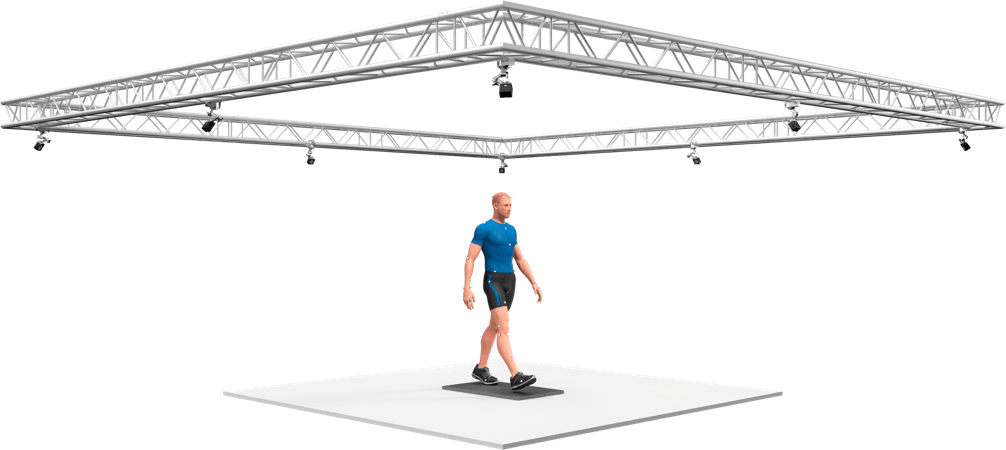
II. Portability – the cameras of optical mocap systems are typically setup in a lab environment semi-permanently. Though they can be set up on tripods in a new testing environment, it takes a fair bit of work and there are certain limitations. The Notch Kits are highly portable which means motion capture can be done in many different locations and settings.
III. Ease of setup – before an optical mocap system is ready for a user to hit “Record”, it needs to be calibrated using its software and the athlete must be prepped too. Preparation includes having the athlete put on “mocap friendly” clothing which is nothing loose or flapping and nothing reflective. Then comes sticking markers on to the athlete’s joints (ones that require tracking). With Notch, there aren’t restrictions on clothing as long as the bands can be secured on the athlete’s limbs. They could even be worn under clothing. Calibration and setup is all done on a mobile device.
So with all that in mind, let’s have a look at what you would get from a Notch Kit, how to set it up, how it all works and some overall thoughts.
What we get (unboxing)
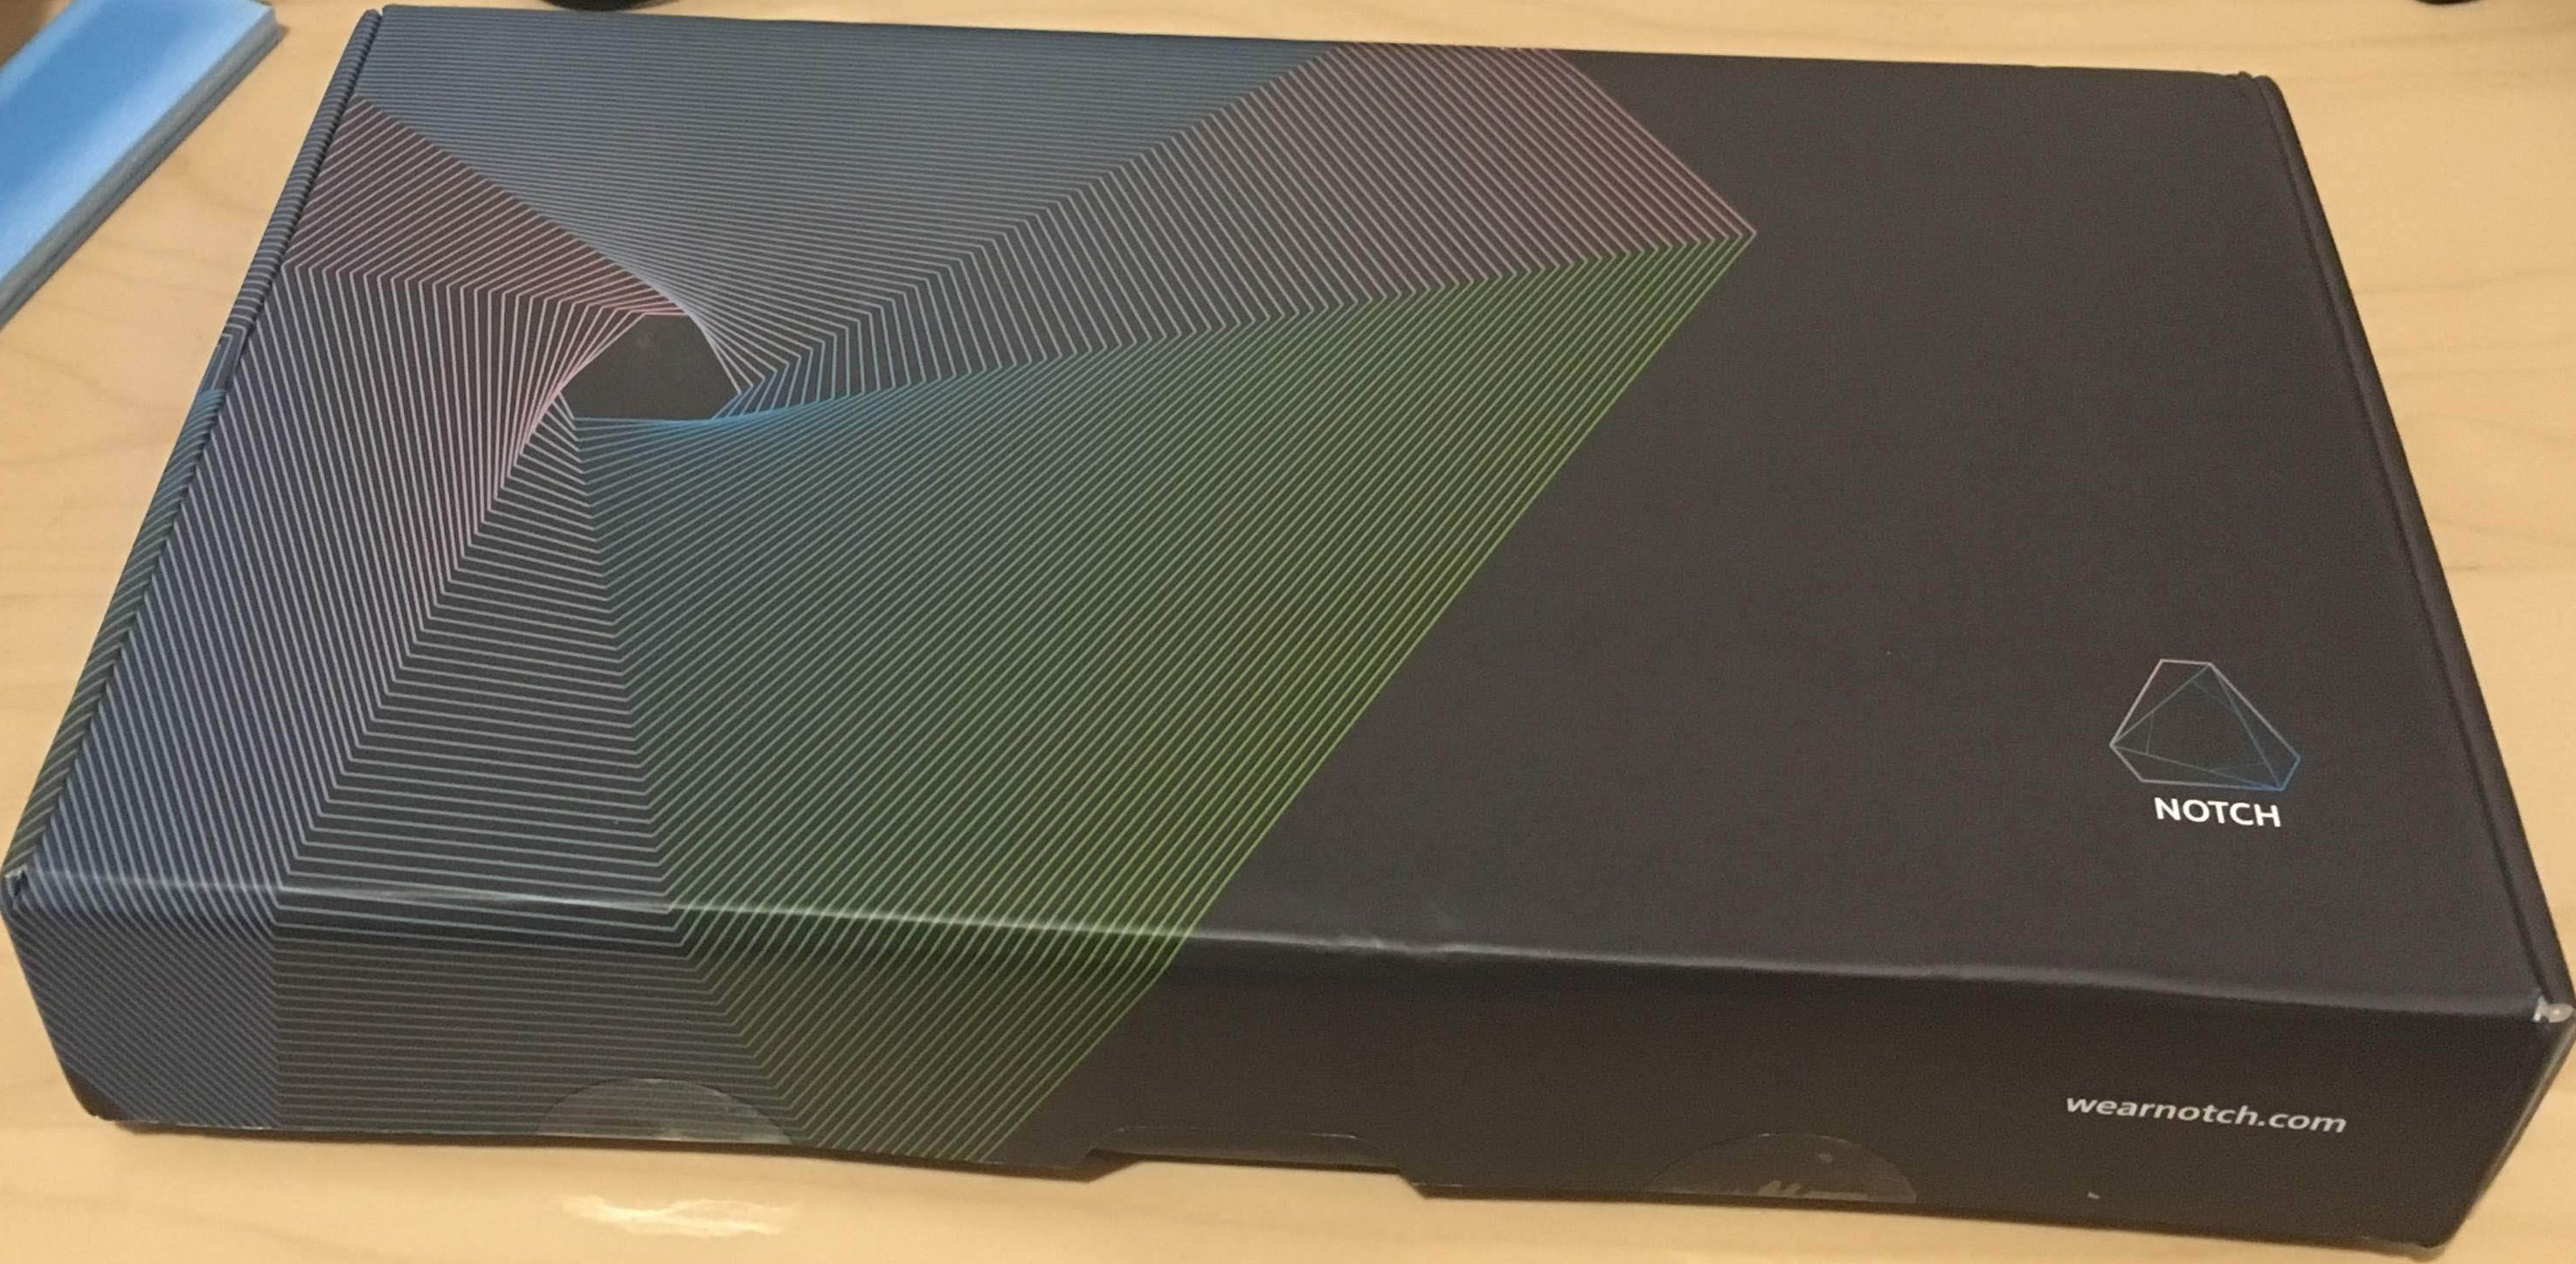
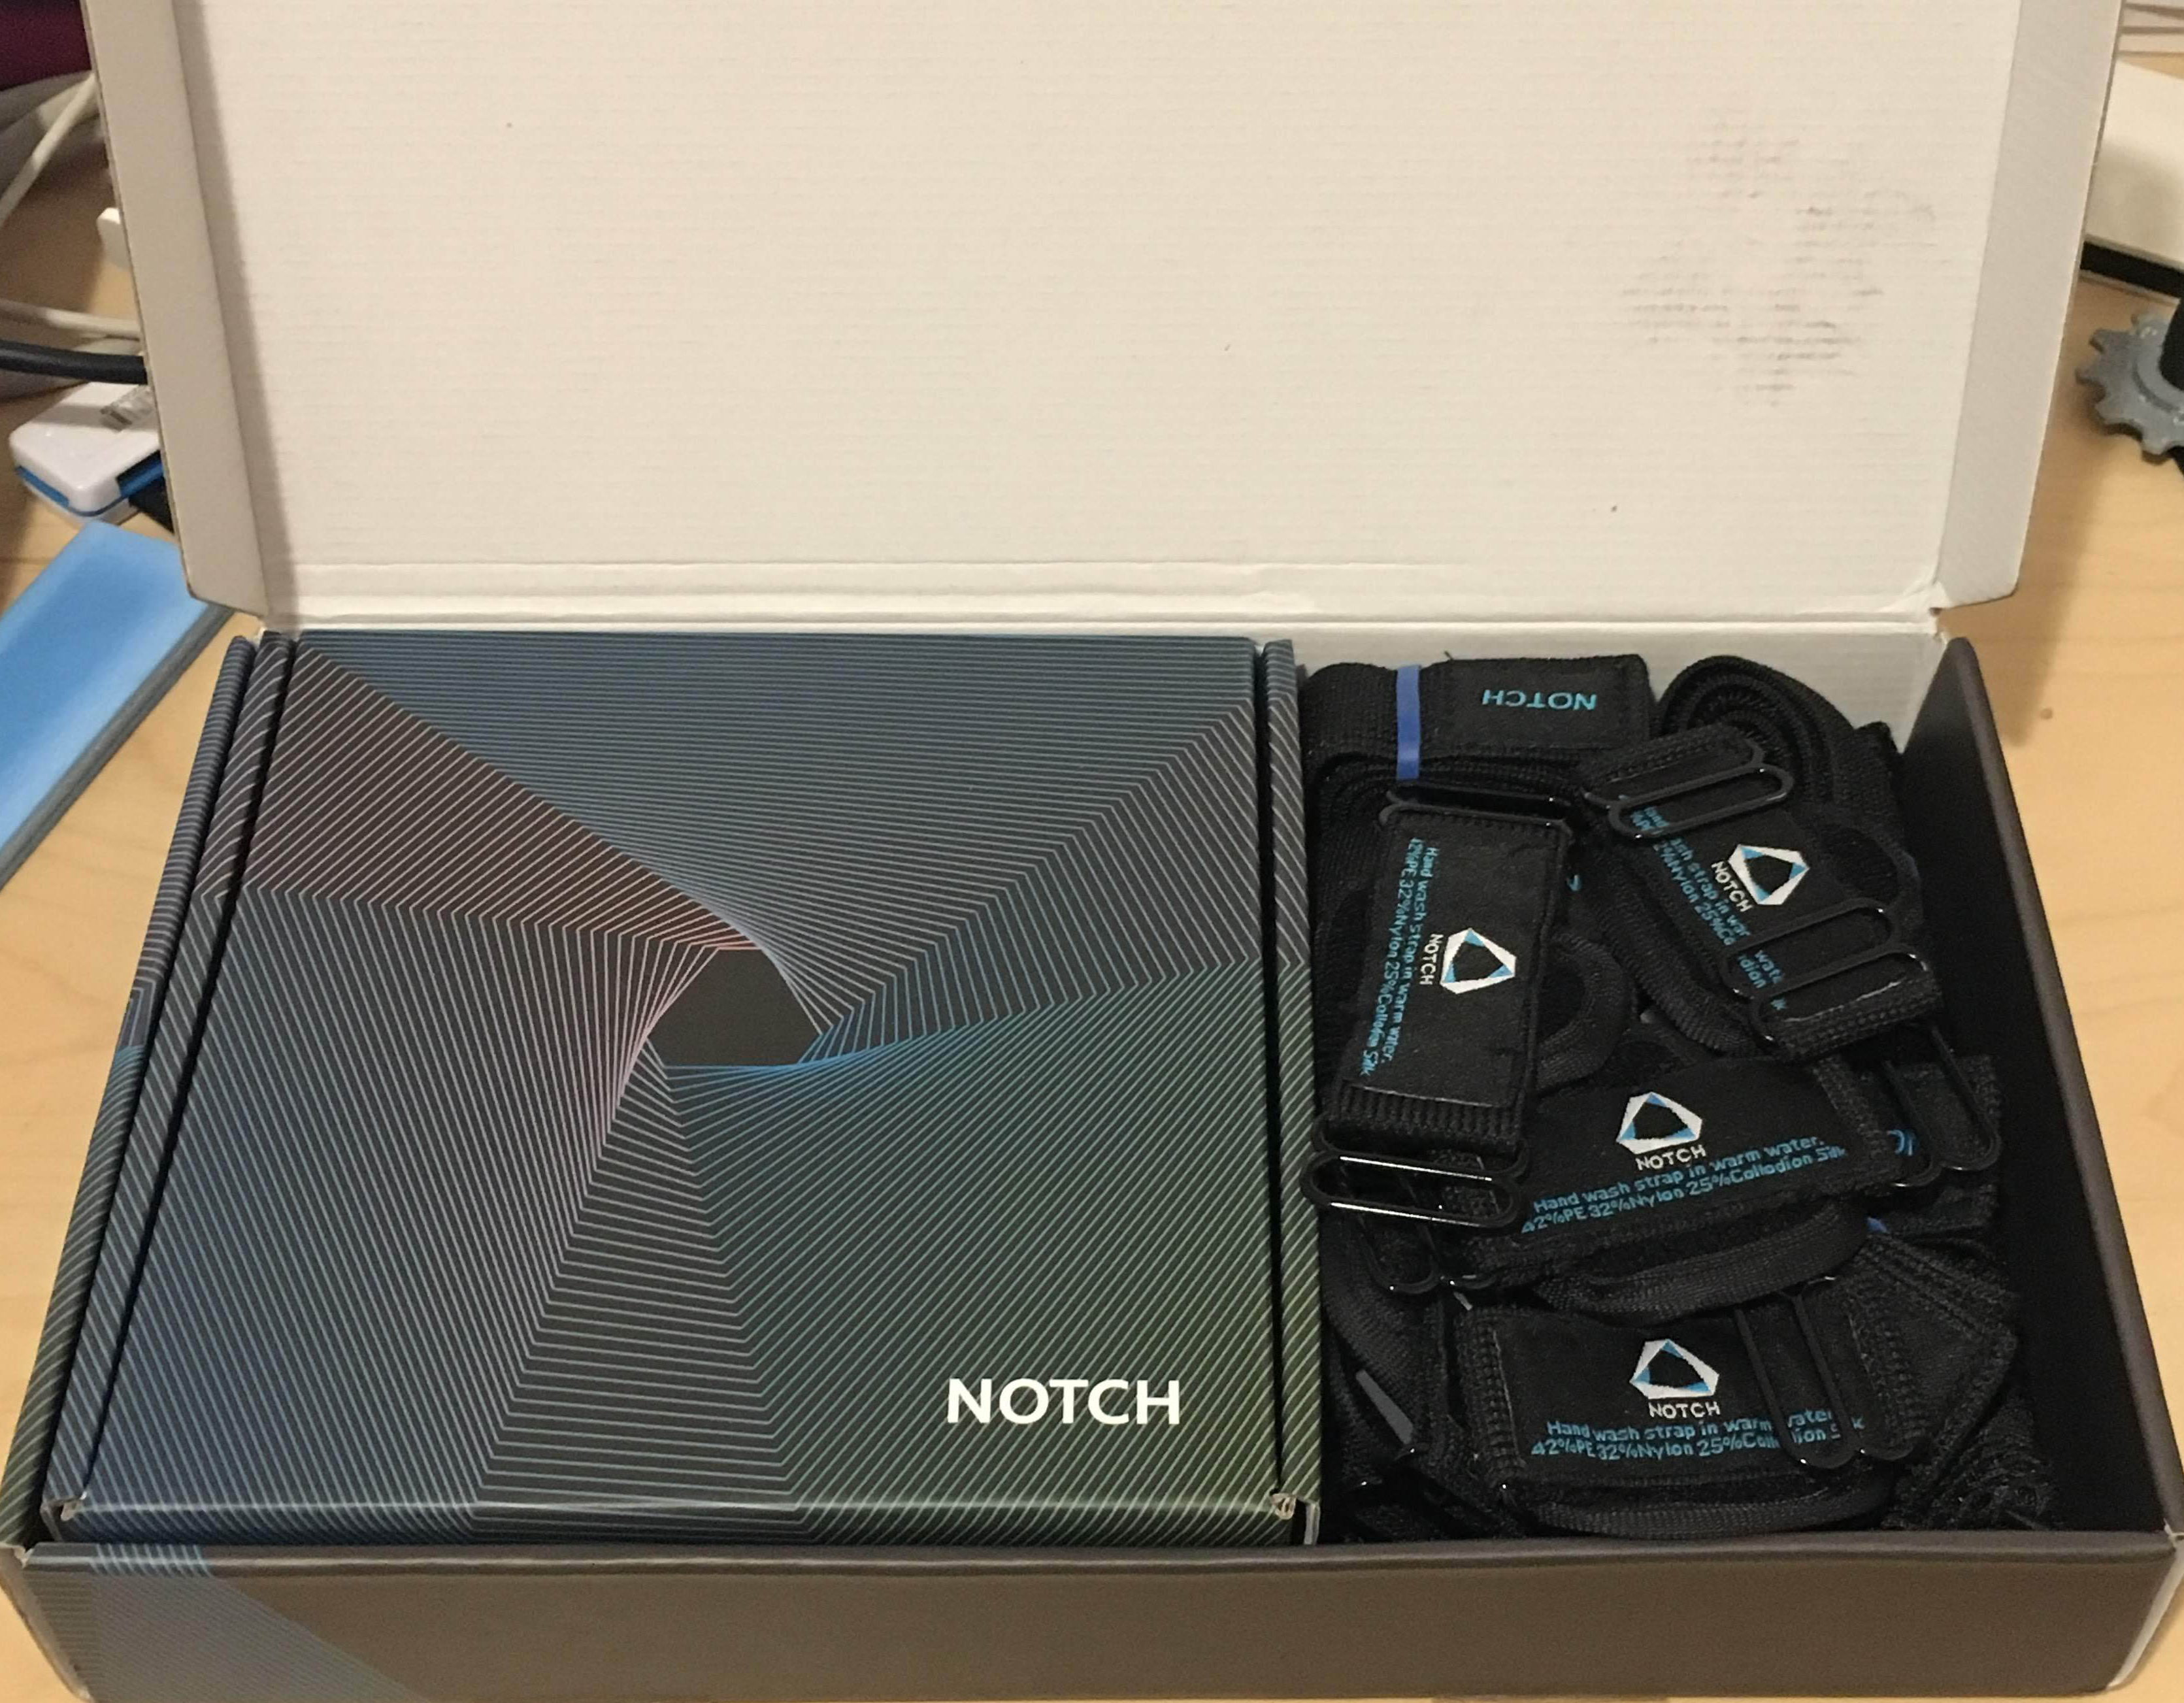

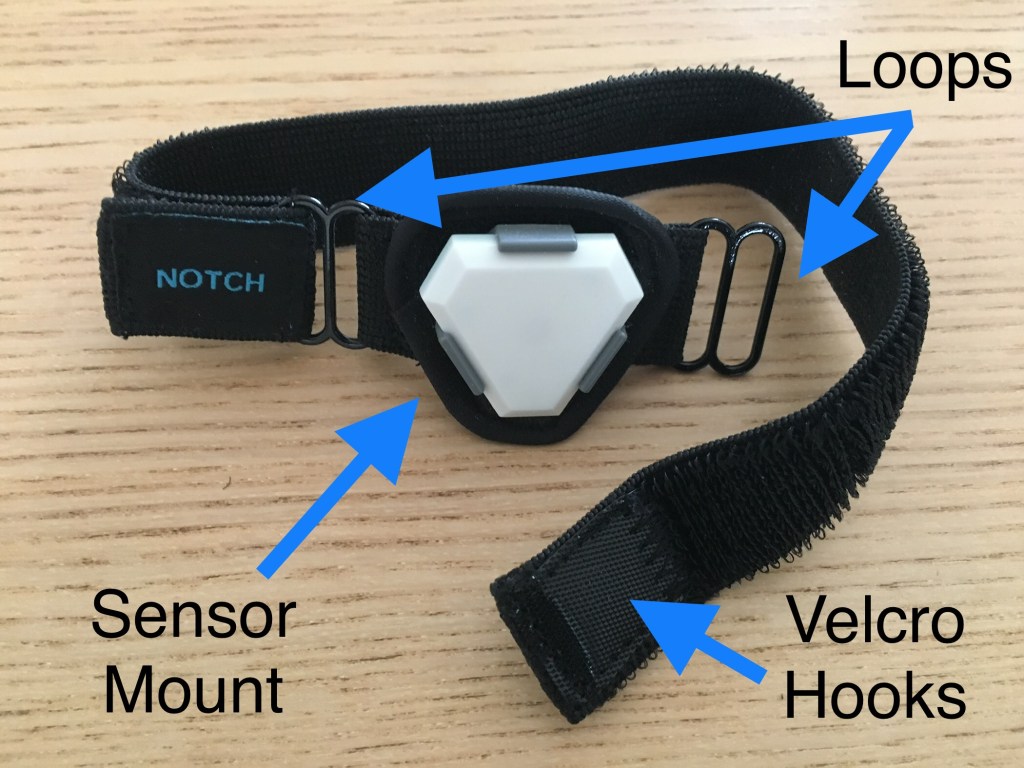
Each Notch Kit comes in a box with everything neatly packed inside including the six sensors (Notches) that sit inside a charging dock (designed in the same shape as a Notch). There are six sensor mounts with loops for the elastic straps and two sensor mounts with clips. Seven elastic straps of three different lengths – 3 x 60cm (long), 2 x 32cm (medium) & 2 x 17cm (short). Each elastic strap has velcro hooks on both ends that can go through the sensor mounts with loops and hook back onto the strap. The short straps might be good for securing the sensors near your wrists/lower arm or ankles. The medium straps, upper arms or thighs. The long straps, chest or waist. But this is what worked for me. For athletes who are bigger sized, they might not use the short ones at all. Lastly, in the box is a draw string bag that lets you pack everything in so that it is easy to carry around. Another plus to it’s portability.
Setting it up
In order to use the Notches, we need to create an account on the Notch website. This could be done with an email or existing Facebook or Google account. After the standard email verification process, we are almost good to go. The next step is to download the Notch Pioneer app which is available on iOS and Android.
Pairing

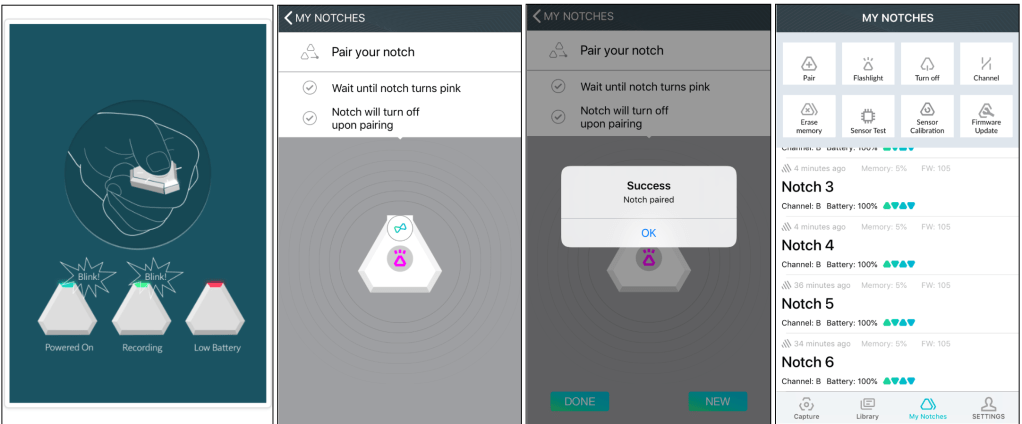
Before pairing, I made sure that the Notches were fully charged using the charging dock and a USB mini b cable. Then it is logging in to the Notch Pioneer app using the account I created earlier, going to the “My Notches” tab and selecting “Pair”. The pairing process (via Bluetooth) pairs one (turned-on) Notch at a time till all six are paired.
Calibration
For some reason, after each Notch is paired, it is turned off. So for calibration, we have to turn them all back on. Then, on the “My Notches” tab, select “Sensor Calibration” and follow the instructions given on screen (see video below), which is to leave all the Notches inside the dock and rotate the entire dock 360 degrees on the horizontal axis (or left to right axis) and rotate it again by 90 degrees on the top-down axis. I think their approach to calibrating all six Notches is very efficient and easy to follow.
Once pairing & calibration is completed (which took about 5 minutes), we can basically move to the next step of putting on the sensors and measuring some movements and activities.
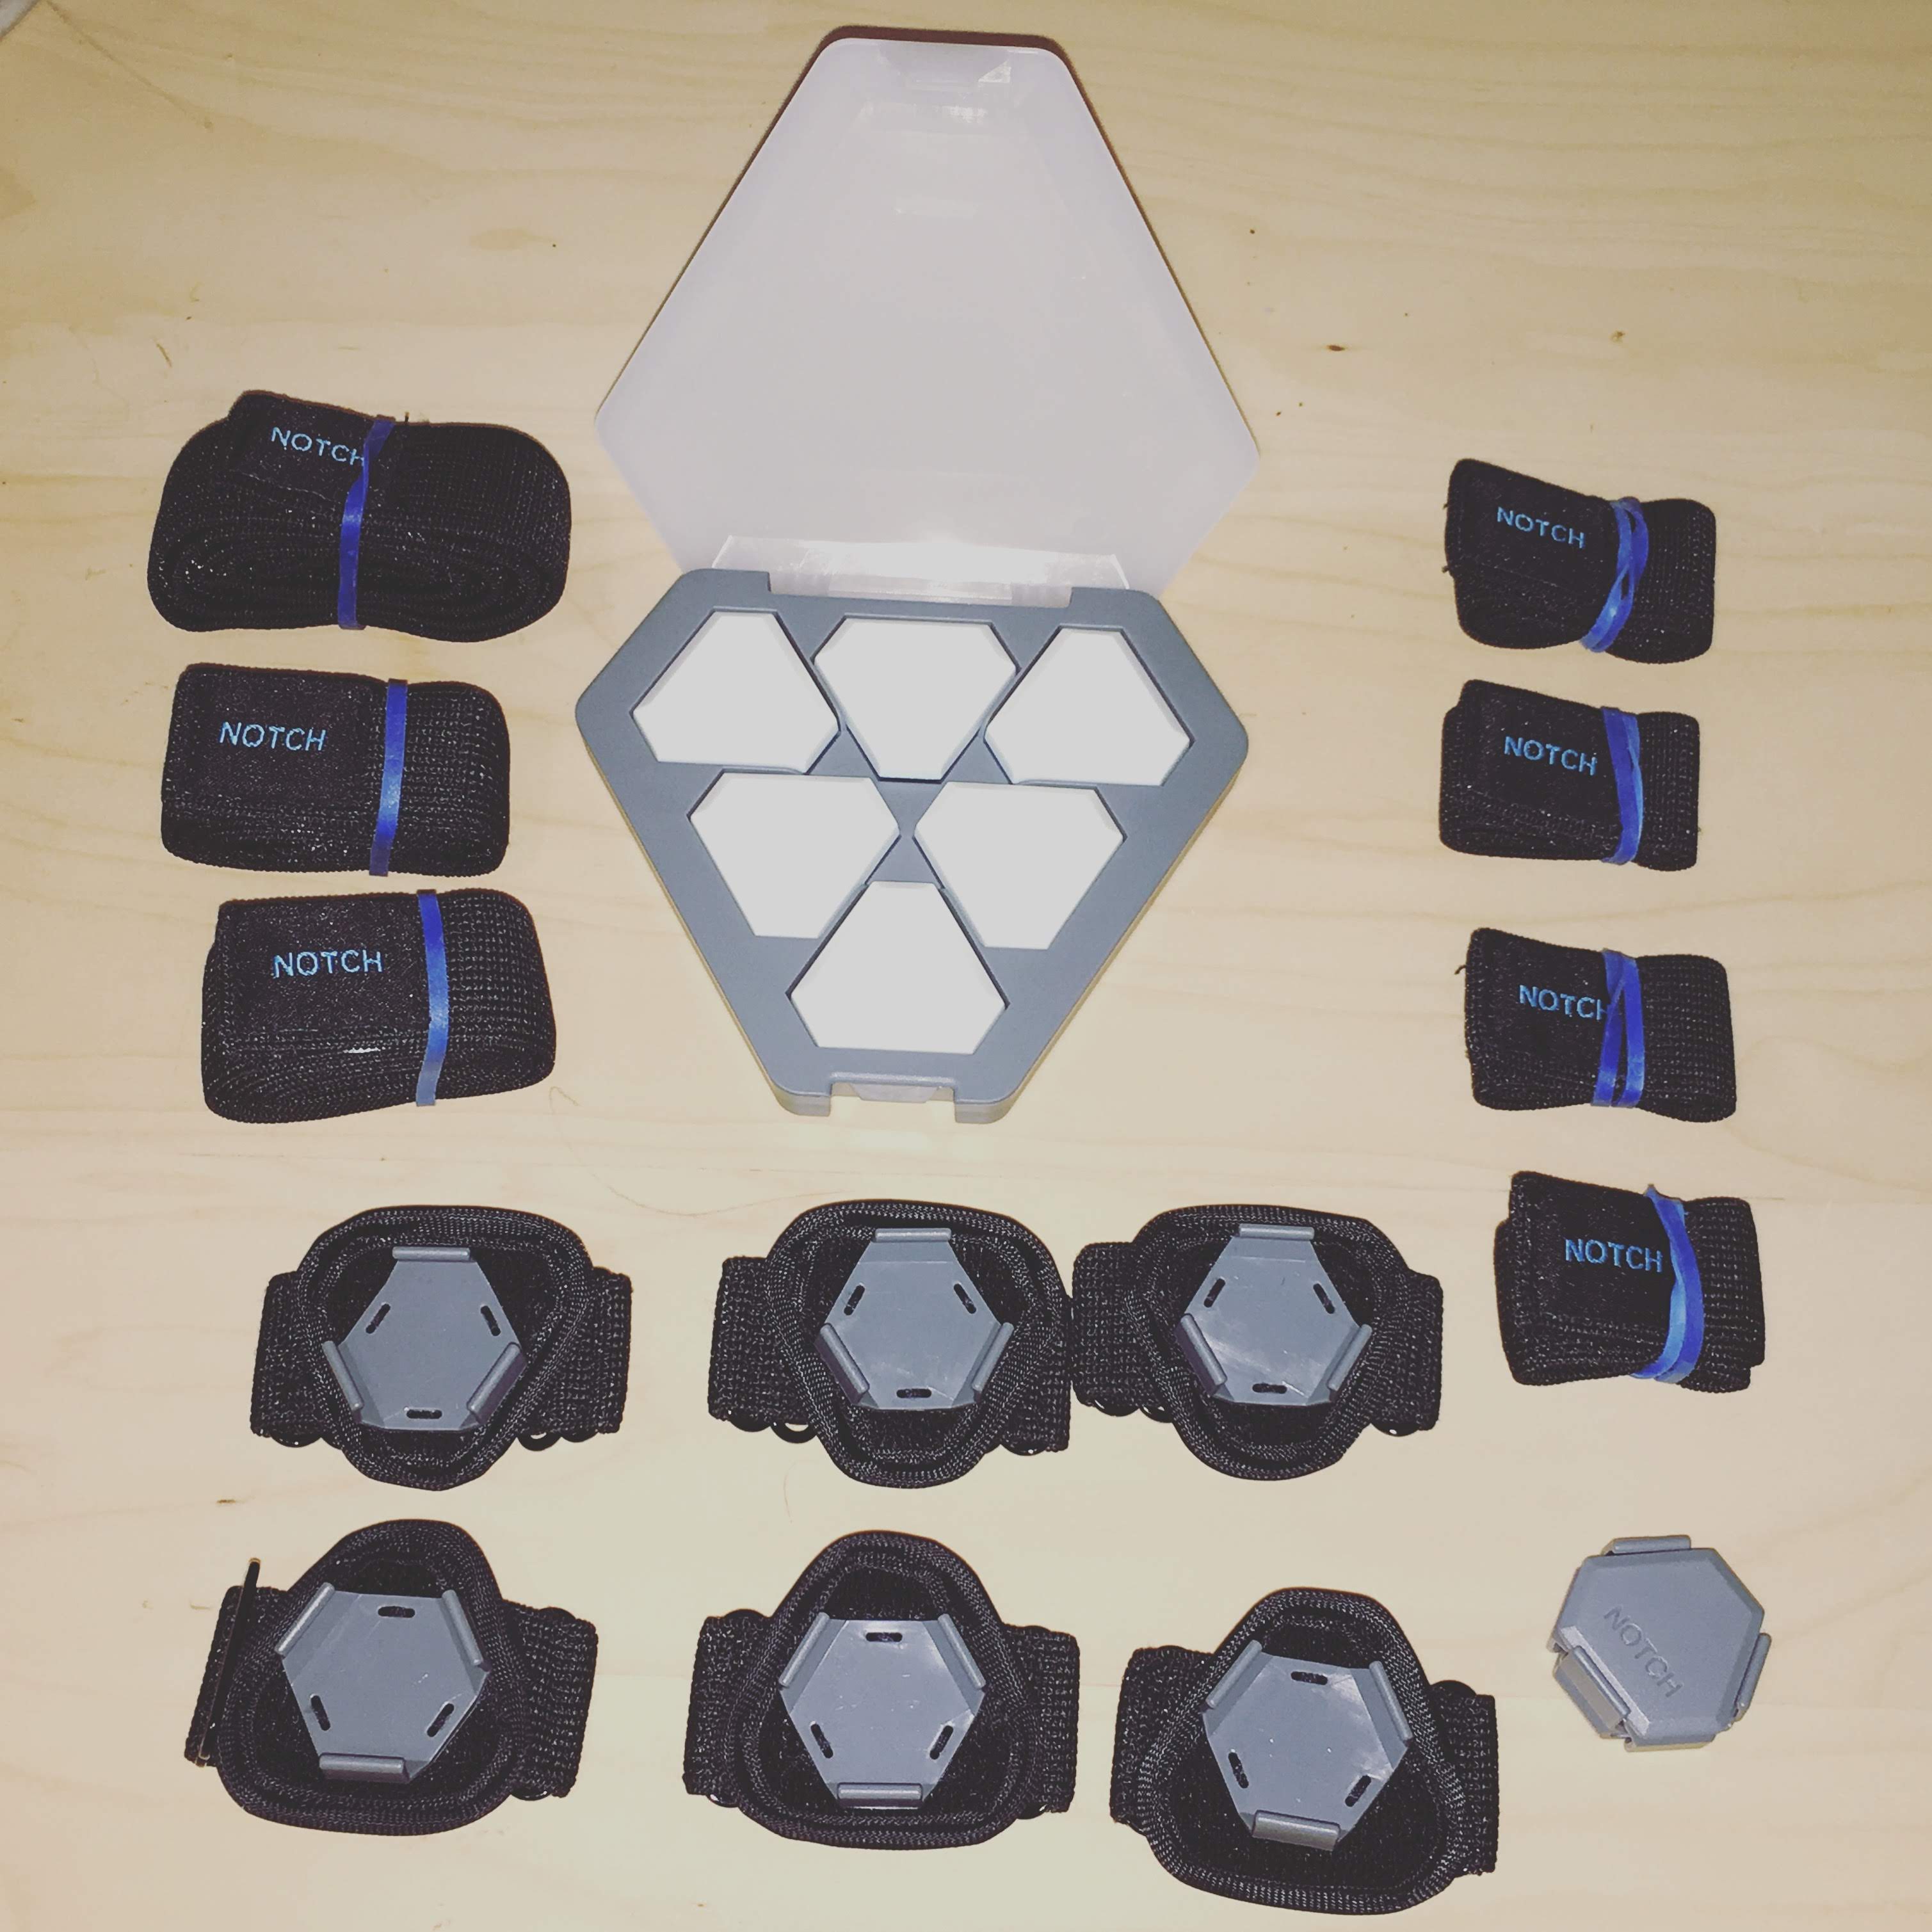
Measuring a movement (eg running)
Creating a new config
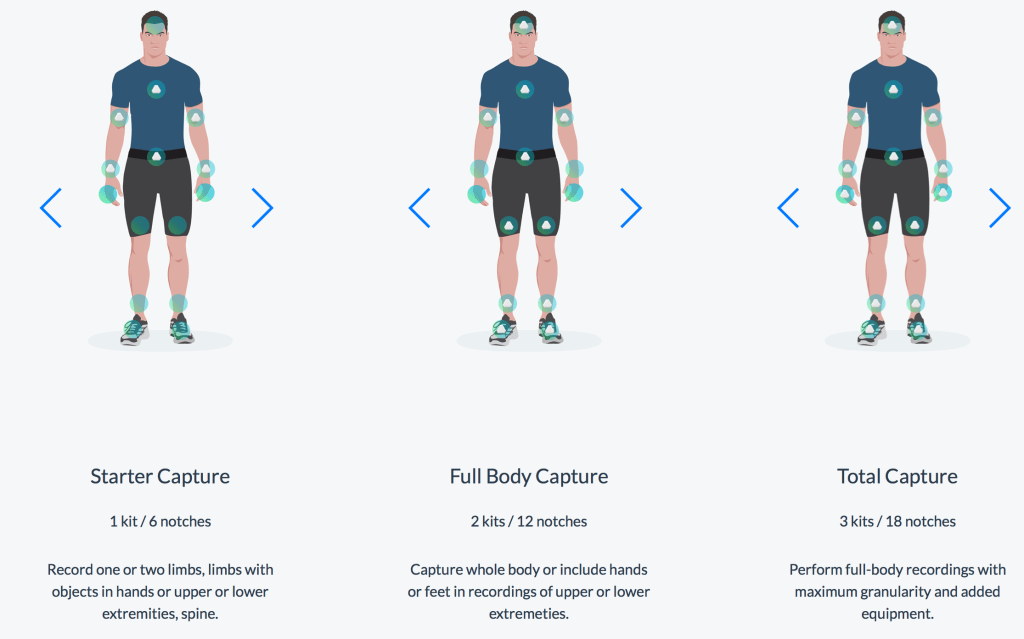
Measuring or Capturing movement data first requires a configuration. That is, selecting which limbs or joint angles we want to measure. If I have 3 kits, I can wear 15 and do a full-body capture and analyse everything. But I have one kit (6 Notches) and so I can only capture certain parts the body which isn’t so bad because I can focus on a specific area and not get distracted by too much data. In this case I decided to do an example of running and measuring my knee angles.

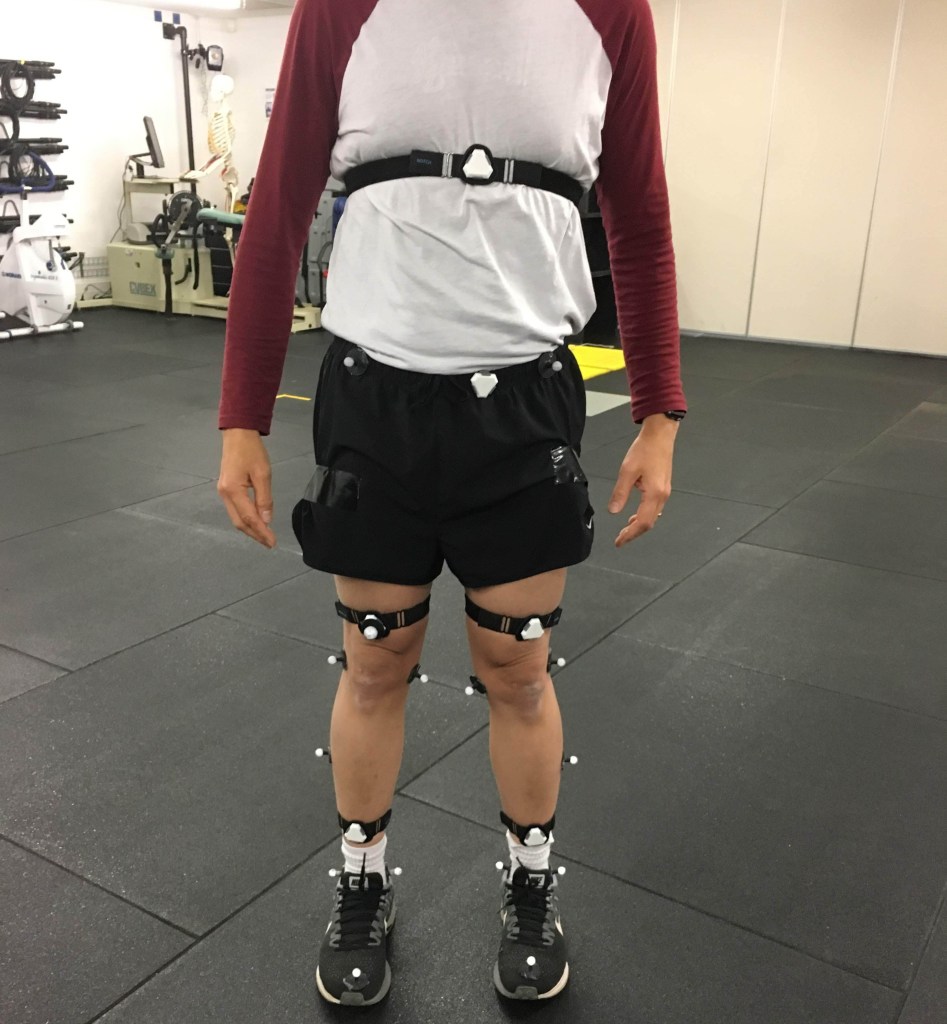
On the “Capture” tab, there are some preset configurations (e.g. Upper body, Lower body or Full body) that we can select if they suit what we need. Or we can create a new configuration which is an option right at the top. When picking a new configuration, one thing to note is that the Notches need to be placed in an order where they are ‘connected’ or as app call it, the next Notch needs to be at a “neighbouring bone”. For example, in my new config called “Running Knees”, I have the Notches on my left shin, left thigh, waist/hip, chest, right thigh and right shin. They are all “neighbouring”. I cannot do a config using left shin, right shin, hip, left forearm, right forearm and chest, because they are not neighbouring.
Wearing the Notches
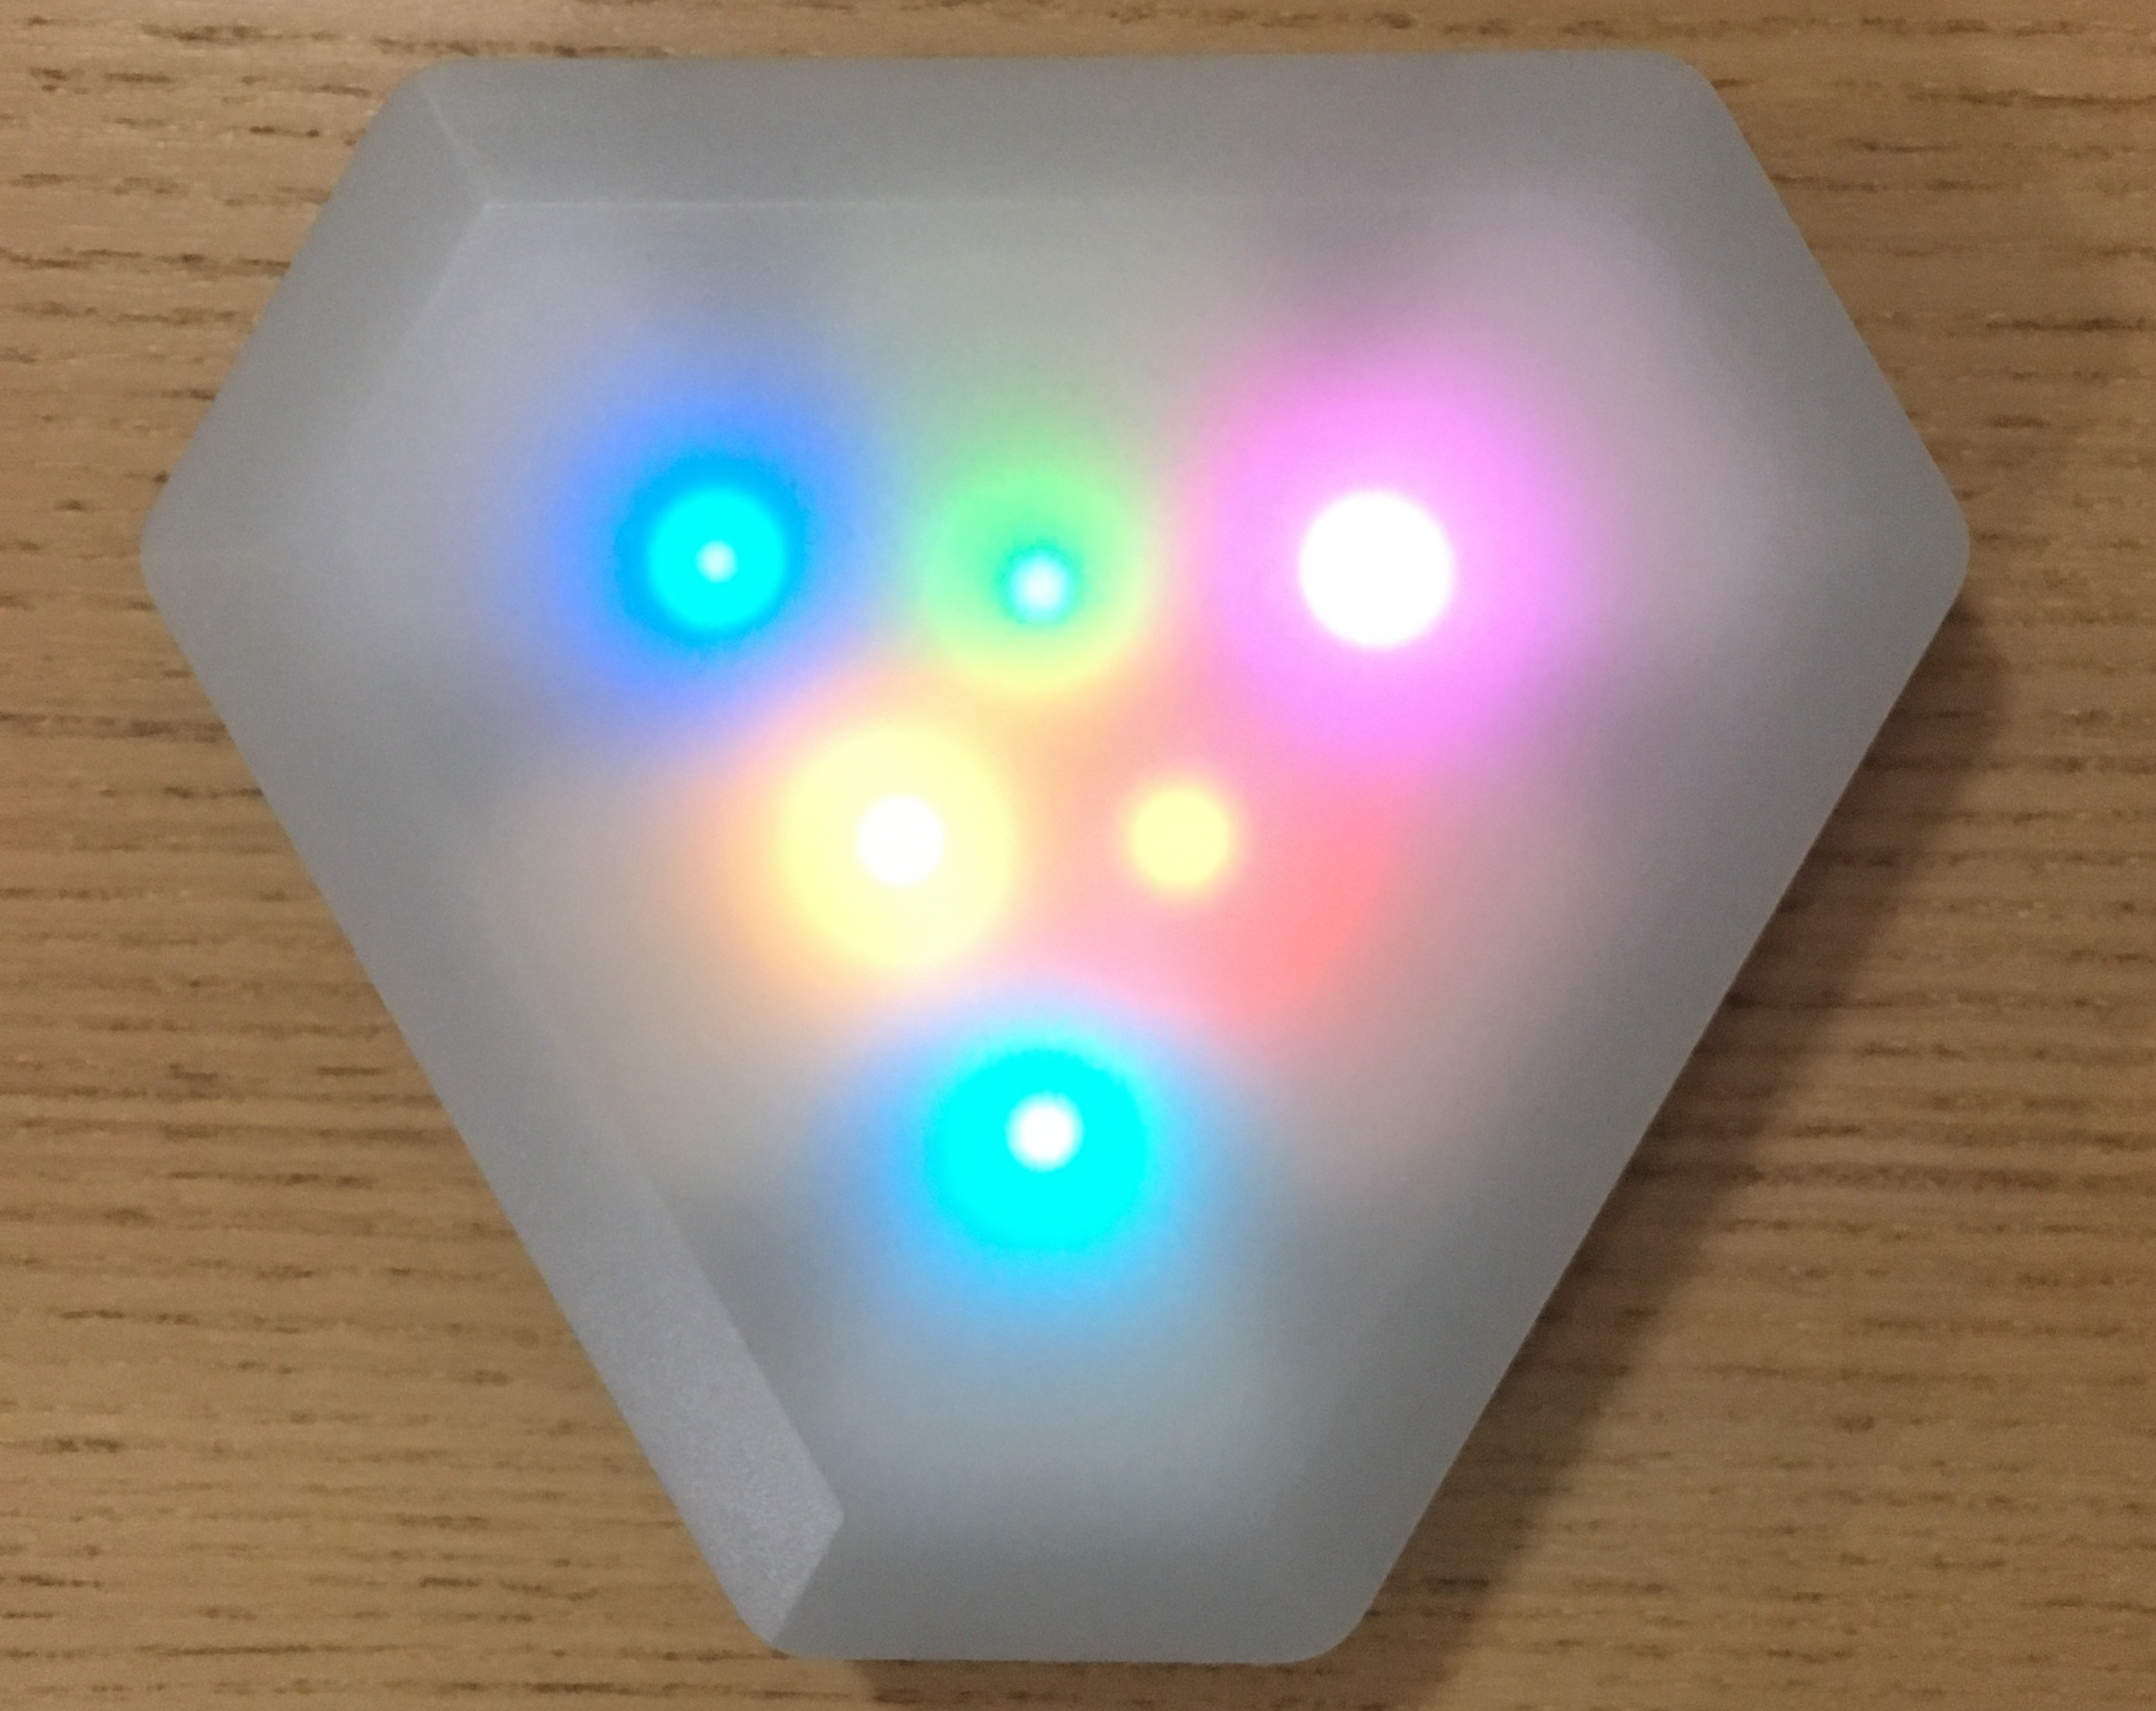
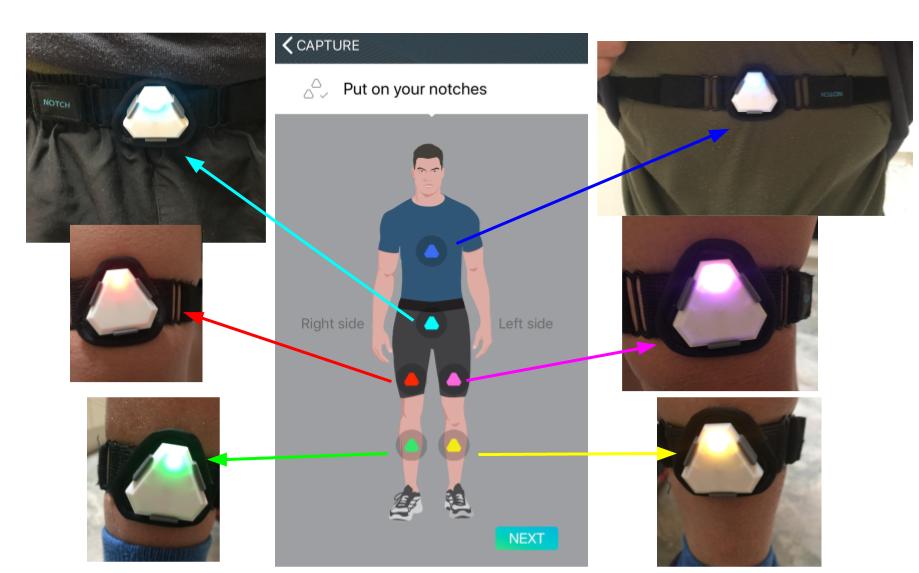
Selecting my new “Running Knees” config on the app, it checks that the Notches are turned on, then connects to them, assigns a colour to each of the six Notches, and shows me where I should wear each colour. Just to make sure I don’t confuse the orientation, the app also labels the Left and Right side.
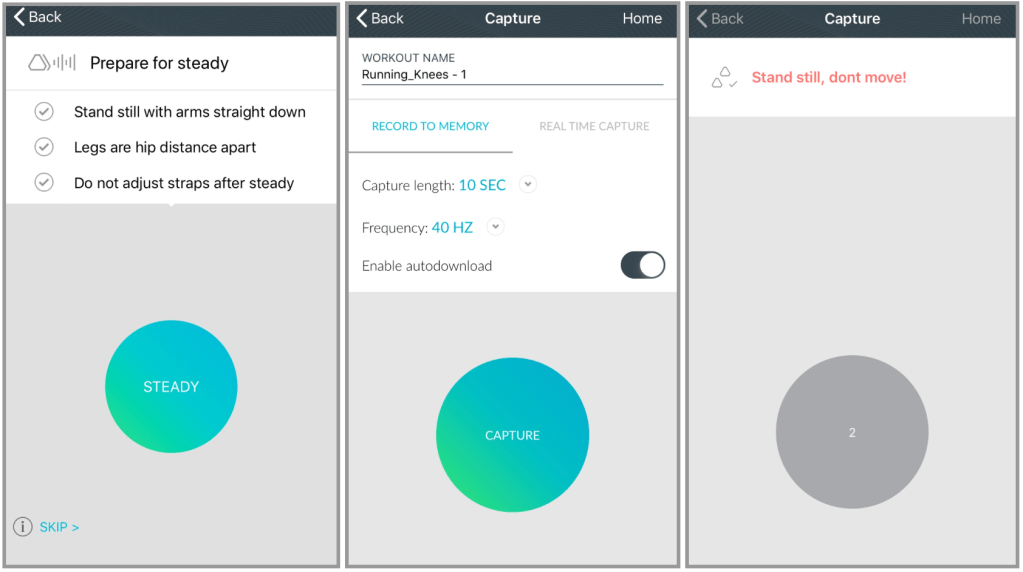
When I was putting on the elastic straps with the mounts for the first time, it took a bit of adjusting to ensure that it fitted comfortably yet secure enough. Being a bit pedantic, I also made sure all the Notches were put on the same way up with the LED at the top. I reckon it wouldn’t make much difference because just before we start capturing data, we are asked to hold a “Steady” pose – which is to stand still with legs/feet hip distance apart and arms straight down. Also, we are cautioned not to adjust the straps from that point on.
Capturing movement data
After all that (which took between 5 – 10 minutes), we are brought to the “Capture” page where we can 1) name the session, 2) choose “Record To Memory” or “Real Time Capture” , 3) select Capture length and 4) select (sampling) Frequency.
“Record To Memory” vs “Real Time Capture”
The “Record To Memory” option is to have all the motion data captured onto the Notches on-board memory, then we can download the data onto the app after the session. Whereas “Real Time Capture” gives us real-time visual feedback (on the app) of our motion. In other words, the motion data is streamed directly onto the app. Although “Real Time Capture” sounds like a better option, there is a limitation to it – we can only use 3 Notches in this option.
Capture length (duration) & Frequency (sampling)
Capture duration can be as low as 2 seconds and go up to 300 seconds (or 5 minutes). Frequency (sampling) starts from 10 Hz up to 500 Hz. The choices for these two options really depends on what is being measured. If I am measuring a cricket bowling action, which is quite high speed and has a short duration, I might pick 5 secs and 500 Hz. But for this review, I am just going to do a short (20 secs) and slow run to measure my knee angles, and I am going with 40Hz.
When I hit Capture, I am asked to stand still again for 5 seconds before I can start moving. A countdown goes on the screen with a ticking sound (if I turned on audio cue) and I do my slow run for 20 seconds. A countdown timer shows the time left for recording and when the 20 seconds is up, recording automatically stops and data starts downloading from the Notches to the app. Once downloading is complete, we are brought to a playback screen where we can see the recording of our movement on an avatar in 3D.
Analysing the movement data
As seen in that video above (or link here), it is a reconstructed skeleton or avatar of me during that 20 seconds of running. As I only had the Notches on 6 locations, there is only motion data of my thighs, lower legs, hip and chest. My arms, neck and head appear to be doing their own thing. Also, it might be because I don’t have sensors on my feet, the reconstructed 3D motion data shows my feet criss crossing each other which looks very odd.
Playback options on the app
There is the option to view the playback on the iPhone app and we can select specific joint angles to be displayed and also adjust the playback speed down to 1/8 times. Although it looks rather wonky (with the criss cross feet), I can still see my left/right knee angle during stance or when my feet lands.
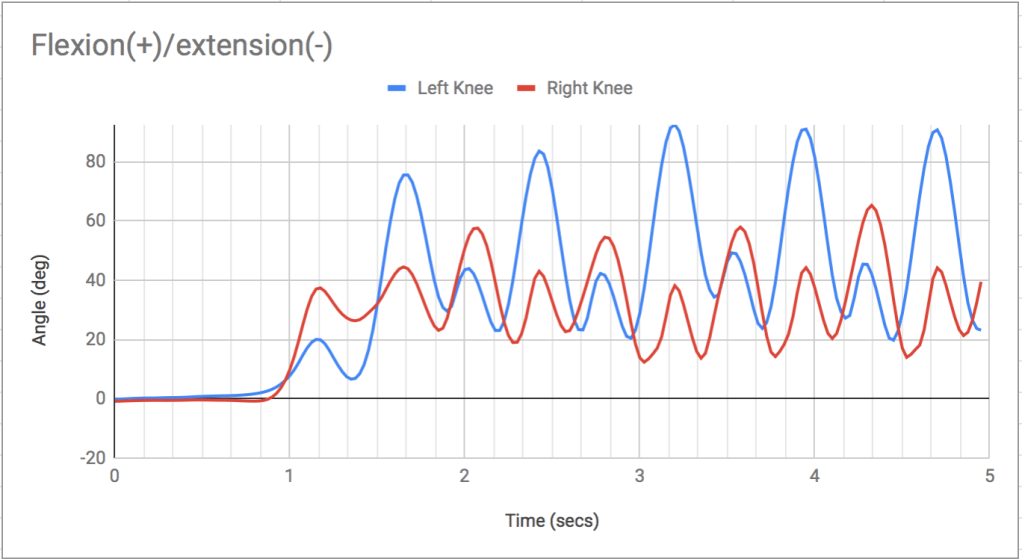
Downloading data in csv
Or if you are into numbers and charts like me, you can also download the angles data either from the app (and save it to the cloud like Google Drive) or from the Notch website. The data should automatically upload from the app to the Notch cloud library and is accessible with my login on the website.
Extended license
As a regular Notch User, I can only access processed measurements such as position and angles. If I wanted the raw acceleration and gyro data, I need to get an extended license that costs $49 (USD) per year
Our Verdict
The Notch Kit is a very well designed wearable motion capture system that is easy to setup and has a pretty decent app that guides you through the process. The Notch team has taken lots of measures (pun intended) to ensure that the captured data is as accurate as can be. There is the initial calibration, the “Steady” pose after selecting a config, and the “standing still” just before “capturing” commences. However from my above example, we can see the 3D playback is still not great. It might be a calibration issue or that my placement of the sensors were not ideal.
More on Accuracy
In terms of accuracy, I had the opportunity to test the Notch in a biomechanics lab some time back and compared the Notch angle data with a optical mocap system. It was a very simple test, nothing too scientific. I performed a number of squats and compared the measured angles of my knees from the Notch Kit and the mocap system. Turned out that my deeper squats had bigger errors and a lesser bend on the knees were better. The manual does mention that users can input personal body measurements to personalise the biomechanics model and improve the accuracy of the measurements. But I was unable to find that. It might be in an older app version or not in the iOS app.
Applications
If I am only using the Notch Kit, the basic license and the Notch Pioneer app, there aren’t any specific applications for tracking performance. There are some basic features for measuring different joint angles that I can analyse on my iPhone or on my laptop. One good thing about that is its flexibility; and if I have 3 Kits, I can capture up to 15 joint angles and measure lots of different movements, and collect heaps of data which is my thing.
Another key feature of the Notch Kit is that it supports custom application development in iOS and Android. So it’s great if you have an idea for a sports or motion capture app, then you can skip the hardware development and just develop the software for it. A company that has utilised the Notch Kit and created sports specific solutions is 4D Motion. So far, they have created solutions for golf, baseball as well as for physical therapy.
What would be cool to see next time
At the moment, Notch seems to have more support for Android applications (even for developers). So it will be cool if the Notch team could put in a bit more work for iOS users. I understand that is easier said than done. Another thing is if they could add support for external sensors (e.g. heart rate or EMG), that would be quite useful I reckon.
Would I keep using the Notch Kit? I think it’s a yes for me. It is a very handy tool to have for measuring sports movements and getting some data for reference. The fact that it fits in a small bag and is so easy to setup makes it very portable and usable. The next thing for me is to find time to work on a custom app using their SDK.
And that’s all for this review. Feel free to leave a comment if you have any questions related to this or if you would like to share your own experience of using the Notch Kit. With that, thanks for reading!
